|
Click on this image to view the print control source
Generating and modifying a PCF form
Generating a PCR report template
Extracting PCR data from a print file
Using PCLP to replace pre-printed stationary
Delivering a document via e-mail
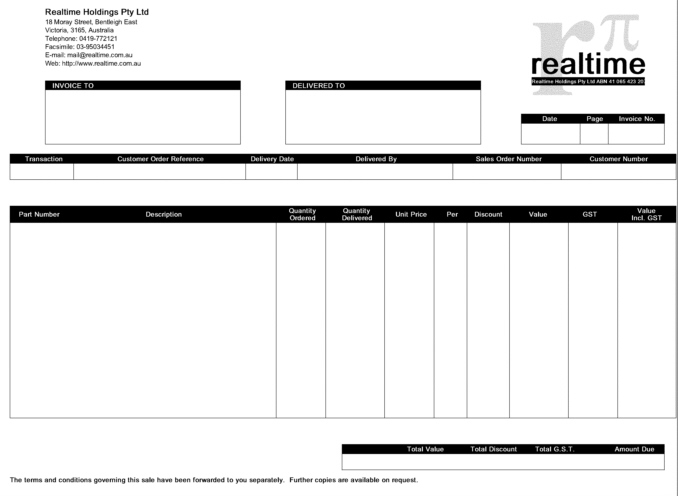
The form shown below is included in the example files which are included in the installation files. To generate this form as a PDF file, issue the following commands;
cd $Utools/UtoolsYou can then use Adobe Acrobat Reader or any other viewer capable of displaying PDF files to examine the file. For example, on Unix you might call "xpdf" to view the file. i.e.;
bin/pcf -TPDF < macros/source/pcfexample.pcf > /tmp/pcfexample.pdf
xpdf /tmp/pcfexample.pdf
Click on this image to view the print control source
The same form can be generated as a laserjet print file, and sent to a printer. e.g.;
bin/pcf -TPCL < macros/source/pcfexample.pcf | lpr -PlpIn both of these commands, the Print Control Forms interpreter (pcf) was called with the "-T" option indicating which printer driver, and thus which output format would be generated. The form is defined in a text file which is read from standard input, and the resultant file is written to standard output.
Click on the above image to view the entire source code. The first line is an include statement which points to a "glossary file" containing two functions which are called to display the Realtime logo and address. i.e.;
The glossary file "realtime.lib" declares functions "realtime_logo_large" and "realtime_address_medium". Both these functions accept two arguments being the X and Y offset at which the logo and address will be placed. The above code block also defines constants for bold and normal which will be used with subsequent calls to the font() function.
#include $Utools/Utools/macros/source/realtime.lib
bold = 3;
normal = 0;
landscape();
realtime_logo_large(225, 6);
realtime_address_medium(19, 6);
The remainder of the source file uses a combination of line drawing, text and font selection function calls to define the layout of this form. The following extract shows the source code which draws the totals box at the bottom of the page;
All lines with a period (dot) in the left column are commented out and do not apply. All dimensions are in millimetres. Following is a brief description of each of the function calls in turn.
box(145,188,137,11,0.2);
.vert(222,188,13,0.2);
.vert(247,188,13,0.2);
hor(145,192,137,0.2);
fill(145, 188, 137, 4, 100);
reverse_on();
font(52,8,bold);
text(180,191,"c", "Total Value");
text(209,191,"c", "Total Discount");
text(235,191,"c","Total G.S.T.");
text(269,191,"c","Amount Due");
reverse_off();
Try changing the above source code as shown below to produce title bars with greyed areas instead of solid black. The altered lines are shown in red, i.e. the percentage is changed in the fill function, and the reverse_on and reverse_off functions are commented out.
- box draws the outline box for all the totals. The box is drawn as a 0.2mm thick line.
- hor draws a horizontal line, although this is overwritten by the following fill function.
- fill fills a rectangular area with 100% black.
- reverse_on will cause the subsequent text to be written as white letters on black.
- font selects helvetica (typeface number 52) 8 point in bold face.
- Each call to text places text centred on the given X and Y coordinates.
- reverse_off allows subsequent text to print as black letters on a white background.
These changes will give the following effect (and use far less toner on a laser printer!);
box(145,188,137,11,0.2);
.vert(222,188,13,0.2);
.vert(247,188,13,0.2);
hor(145,192,137,0.2);
fill(145, 188, 137, 4, 10);
.reverse_on();
font(52,8,bold);
text(180,191,"c", "Total Value");
text(209,191,"c", "Total Discount");
text(235,191,"c","Total G.S.T.");
text(269,191,"c","Amount Due");
.reverse_off();

Previous versions of the Print Control report writer would accept data in a prepared format which defines the header, footer and record structure of the data while the layout and presentation is defined in the Print Control report template. This version of Print Control uses the same data format and directives, but provides improved report template definition with the enhanced syntax of PCF. Plus you can also generate the report as a PDF file for e-mail delivery, instead of only as a laserjet (PCL) print file.
The installation files include a sample report template and data file. Issue the following commands to generate the report as a PDF file;
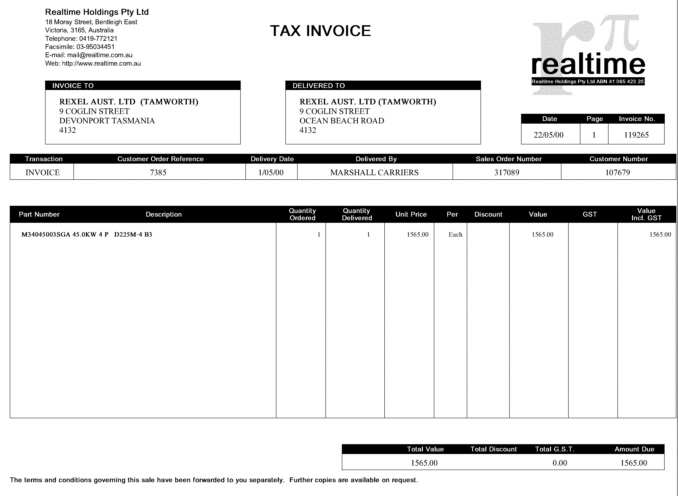
cd $Utools/UtoolsThis will generate a twenty page PDF document, the first page of which is displayed below;
bin/pcr -TPDF < demo/pcrexample.data > /tmp/pcrexample.pdf
Click on this image to view the print control report writer template
This report includes the same form which was described in the previous chapter as an example of a Print Control form. All the text which appears on the form is laid out according to the report writer template file. The report writer template is defined as a glossary file which includes the following glossary sections;
The init section
- init This section is called before anything else. It is typically used to declare and initiate global variables.
- start The report writer runs in two passes. This section is called after the first pass and is typically used to restore global variables to there initial state if they are modified during the first pass.
- header This section is called at bthe start or each new page. The data file may include header records which are read and retained by this section.
- record This the default record which is called to process any records in the data file.
- totals This record is named by a directive in the data file. It will supply the three fields which appear in the totals box at the end of a page.
The start section
#init
global _note_flag, _y, _xtotal, COMPANY;
global normal, bold, italic;
normal = 0;
bold = 3;
italic = 1;
start();
))
Global variables are defined and initiated in this section. The variables which also need to be re-initiated after the first pass will do so by the subroutine call to the start(). i.e. Glossary sections can alled be called as subroutines.
The header section
#start
_xtotal = 0.0;
_note_flag = 0;
))
This start section simply restores some global variables which are used as flags in the report, and which may have been altered during the first pass.
The record section
#header
rec = data(20);
Page_End = 210;
COMPANY = rec[0];
landscape();
include("$Utools/Utools/macros/source/pcfexample.pcf");
if (Copy > 1)
graphic(120,100,"$COPY");
font(5,10,bold);
text(25,44,"r",rec[1]);
font(5,10,normal);
text(25,48,rec[2]);
text(25,52,rec[3]);
text(25,56,rec[4]);
text(25,60,rec[5]);
font(5,10,bold);
text(127,44,rec[6]);
font(5,10,normal);
text(127,48,rec[7]);
text(127,52,rec[8]);
text(127,56,rec[9]);
text(127,60,rec[10]);
text(233,58,"c",rec[11]);
text(252,58,"c",rec[12]);
text(270,58,"c",rec[13]);
font(52,18,bold);
if ( rec[14] == "INVOICE")
text(135,15,"c","TAX INVOICE");
else
text(135,15,"c","ADJUSTMENT NOTICE");
font(5,10,normal);
text(18,74,"c",rec[14]);
text(67,74,"c",rec[15]);
text(115,74,"c",rec[16]);
text(159,74,"c",rec[17]);
text(215,74,"c",rec[18]);
text(262,74,"c",rec[19]);
_y=100;
))
The header directive in the data file will be followed by 20 data fields. These data fields are read by this section into an array variable named rec. Elements of this array are then passed as the string to the many calls to the text function.
The header will also include the form overlay and apply a "copy" stamp if more than one copy is requested.
Lastly, this section sets the global variable _y which will be used as the starting position for subsequent records which are to be placed on the page.
The totals section
rec = data(10);
font(5, 8,normal);
_desc = rec[0];
col[1] = (float)rec[1];
col[2] = (float)rec[2];
col[3] = (float)rec[3];
if (col[1] > 0) {
font(5, 8,bold);
text(9,_y,"r",_desc);
font(5, 8,normal);
text(136,_y,"a",format("%g", col[1]));
text(157,_y,"a",format("%g", col[2]));
text(182,_y,"a",format("%.2f", col[3]));
text(196,_y,"a",strlower(rec[4]));
text(211,_y,"a",rec[5]);
text(235,_y,"a",rec[6]);
text(260,_y,"a",rec[7]);
text(285,_y,"a",rec[8]);
_xtotal += (float)rec[6];
_note_flag = 1;
_y += 4;
}
else {
if ( _note_flag == 1) {
text( 14,_y,"r",_desc);
}
else {
ital();
font(5, 8,normal,italic);
text(24,_y,"r",_desc);
font(5, 8,normal);
upri();
}
_note_flag = 0;
_y += 4;}))
Each record contains ten fields which will be read from the data file. These are read into the array variable named rec. All elements of this array will initially be strings. Array elements col[1] col[2] and col[3] will be cast as floating point numbers, and element col[1] will be tested in the if expression to determine if the record includes a quantity.
Lastly, this record will increment the global variable _y for the starting position of the next record.
rec = data(3);
font(5,10,normal);
if ( rec[2] != "" ) {
text(186,197,"a",format("%.2f", _xtotal));
text(241,197,"a",rec[1]);
text(275,197,"a",rec[2]);
_xtotal = 0.0;
}
))
This is a simple record which will read three fields from the data file. It will also print a global variable _xtotal which is used to accumulate the total value in this report. After this variable is printed, its value is reset.
Print Control V5 is supplied with a utility program which allows data to be extracted from a fixed format prnt file, and converted into a format which can be used for the Print Control report writer (PCR). This facility is used when you wish to interface a legacy application with Print Control and take full advantage of PCR and its ability to totally reformat and control how the document is prepared. If the application only requires a fixed format print file to be overlaid on a PCF designed form, then PCLP should be used instead.
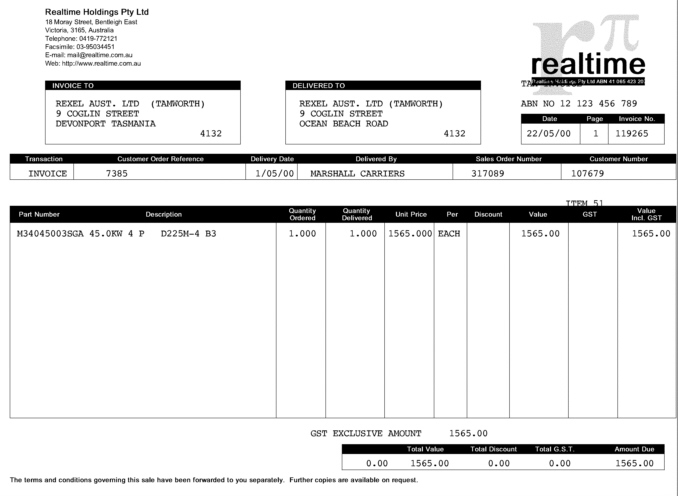
This utility is called timsproc. It is an "awk" script and it requires a single argument nominating a specification file which maps the layout of the print file into data fields. Below is the image of a typical line printer file which is used with preprinted stationary;
This sample print file is included with the installation files. Execute the highlighted commands shown below to see how the print file is converted in to a data format suitable as input into Print Control Report Writer;

The output consists of Print Control directives, such as .RET.pcrexample.pcr and .REH.header, and data extracted from the input file, as directed by the specifications in the TEMPLATE file. This output can then be fed directly into the Print Control Report Writer to generate the report shown in the previous chapter. i.e.
$ cd $Utools/Utools
$ bin/timsproc -v TEMPLATE=demo/pclpexample.spec < demo/pclpexample.data | more
.RET.pcrexample.pcr
.REH.header
REXEL AUST. LTD (TAMWORTH)
9 COGLIN STREET
DEVONPORT TASMANIA
4132
REXEL AUST. LTD (TAMWORTH)
9 COGLIN STREET
OCEAN BEACH ROAD
4132
22/05/00
1
119265
INVOICE
7385
1/05/00
MARSHALL CARRIERS
317089
107679
--More--
bin/timsproc -v TEMPLATE=demo/pclpexample.spec < demo/pclpexample.data \This will generate the same twenty page PDF document described previously, i.e.;
| bin/pcr -TPDF > /tmp/pcrexample.pdf
Where the print file contains sufficient information to identify individual pages and documents, i.e. the each page of the print file contains page numbers and document identifiers such as the invoice number in the above example, the timsproc utility may be configured to break the print file up into individual files for separate processing with PCR.
The following command will generate separate PCR data file for each document found in the print file;
bin/timsproc -v TEMPLATE=demo/pclpexample.spec -v SPLIT=/tmp/pcrdata < demo/pclpexample.data \This command will create many files in the /tmp directory with names starting with pcrdata, and finishing with the document number. A list of all document numbers found in the pint file will be listed to standard output when this program is run.
| bin/pcr -TPDF > /tmp/pcrexample.pdf
Print Control includes a utility which allows it to be used to replace line printers and preprinted stationary. These reports can then be printed to a laser printer, or more conveniently, converted to PDF format for archving or delivery via e-mail. The following commands will overlay a fixed format print file onto a PCF generated form and create a PDF document;
cd $Utools/Utools
bin/pclp -Opcfexample.pcf -TPDF < demo/pclpexample.data > /tmp/pcfexample.pdf
This same file can also be generated as a PCL file and printed on a laser printer, e.g.;
bin/pclp -Opcfexample.pcf -TPCL < demo/pclpexample.data | lpr -PlpThe form which is overlaid includes some variable settings and a font function call at the end of the form definition which determine the position of the text and the font that will be used;
All of these dimensions are in millimetres. The font function call selects courier (typeface number 3) 10 point medium. The remaining variables are;
TopMargin = 28;
LeftMargin = 0;
CharSpacing = 25.4/10.8;
LineSpacing = 25.4/6;
LinesPerPage = 51;
- TopMargin - Distance between top of page and the baseline of the first text row.
- LeftMargin - Distance between the left page and the first column.
- CharSpacing - Character pitch. 10.8 characters per inch in the above example.
- LineSpacing - Line pitch. 6 lines per inch in the above example.
- LinesPerPage - Page breaks will occur and a new page will be generated after the nominated lines per page.
Print Control includes a utility program named notify which may be used for automated delivery of documents via e-mail. This utility will accept a text, HTML and PDF file. The text and HTML files will be used as the covering note for the e-mail, and the PDF file, which will contain the fully formatted document will be attached using MIME.
The following commands show how this is achieved, step by step. These would normally be built into an automated script, probably in conjuction with the timsproc utility;
cd $Utools/UtoolsThe message will be delivered to the e-mail address defined by the shell variable TO. The above commands will;
bin/pcr -TTXT < demo/pcrdata118790 > /tmp/pcrdata118790.txt
bin/pcr -THTML < demo/pcrdata118790 > /tmp/pcrdata118790.html
bin/pcr -TPDF < demo/pcrdata118790 > /tmp/pcrdata118790.pdf
TO=accountspayable@realtime.com.au
bin/notify accountsreceivable $TO "Invoice 118790" tmp/pcrdata118790 \
| /usr/lib/sendmail $TO
rm -f tmp/pcrdata118790.*
This facility demonstrates the ability of Print Control to generate different format documents accordinf to the type of document. In this case, the text and HTML documents only contain simple header information which appears as (in this example);
- (Optionally) change to the Utools directory.
- Generate the text component of the covering letter.
- Generate the alternate HTML encoded covering letter.
- Generate the fully formated PDF attachment
- The e-mail recipient is defined by the shell variable "TO".
- The notify script is called with four arguments;
- Sender's e-mail address (From)
- Recipient e-mail address (To)
- Subject line
- Common name of text, HTML and PDF files.
- The output of notify is piped to sendmail
This text document is created with a far simpler template than the PDF document. This template also resides in a separate directory to the default location. The alternate directory for text files is TXT.templates. Below is the listing of the text template;
The attached file contains invoice 118790
For the attention of:
BALTIMORE AIR COIL AUST P/L
PO BOX 1215
KINGS PARK N S W
7320
For goods delivered to:
BALTIMORE AIR COIL AUST P/L
20 BERNOULLI STREET
PARRAMATTA NSW
7320
Similarly, the HTML document is prepared from a separate template which is stored in the HTML.templates directory;
#header
rec = data(20);
fputs("The attached file contains invoice " + rec[13] + "\n", stdout);
fputs("\n", stdout);
fputs("For the attention of:\n", stdout);
fputs(rec[1] + "\n", stdout);
fputs(rec[2] + "\n", stdout);
fputs(rec[3] + "\n", stdout);
fputs(rec[4] + "\n", stdout);
fputs(rec[5] + "\n", stdout);
fputs("\n", stdout);
fputs("For goods delivered to:\n", stdout);
fputs(rec[6] + "\n", stdout);
fputs(rec[7] + "\n", stdout);
fputs(rec[8] + "\n", stdout);
fputs(rec[9] + "\n", stdout);
))
#record
rec = data(10);
))
#totals
rec = data(3);
))
#header
rec = data(20);
fputs("<HTML>\n", stdout);
fputs("The attached file contains invoice " + rec[13] + "<BR>\n", stdout);
fputs("<BR>\n", stdout);
fputs("For the attention of:<BR>\n", stdout);
fputs(rec[1] + "<BR>\n", stdout);
fputs(rec[2] + "<BR>\n", stdout);
fputs(rec[3] + "<BR>\n", stdout);
fputs(rec[4] + "<BR>\n", stdout);
fputs(rec[5] + "<BR>\n", stdout);
fputs("<BR>\n", stdout);
fputs("For goods delivered to:<BR>\n", stdout);
fputs(rec[6] + "<BR>\n", stdout);
fputs(rec[7] + "<BR>\n", stdout);
fputs(rec[8] + "<BR>\n", stdout);
fputs(rec[9] + "<BR>\n", stdout);
fputs("</HTML>\n", stdout);
))
#record
rec = data(10);
))
#totals
rec = data(3);
))